At rtCamp, the family is expanding. We wanted to automate the process of sending birthday and work anniversary wishes to our Slack workspace, and so Alfred was born. Alfred lets you send birthday and work anniversary messages using the Slack API. It uses Google Apps Script, a cloud-based JavaScript platform, and integrates seamlessly to Google Sheets.
Alfred uses a single Google Sheet as the database for users’ data and wishes that you want to send out. Using time-based Google Triggers, one can run the Google Apps Script at specific intervals to send out the (random) messages automatically using the Slack API. Alfred is an open-source project, and you can find it on GitHub – https://github.com/danish17/alfred-slack-bot.
Let’s take a look at how you can set up Alfred for your workspace.
Creating a Google Sheet
Google Sheet is where your data will live. The spreadsheet will have two sheets, let’s call them Data and Messages. The Data sheet will store all the details about the users, like their birthdates, anniversary dates, and their names. The Messages sheet will contain a list of the wishes and their type, Birthday or Anniversary.
The Message spreadsheet should have the following columns:
- Text – wish text
- Type – whether the wish is for a birthday or an anniversary
In the Text, you can add text placeholders like <names>; Alfred will automatically replace them with the recipients’ names. For example, if the text is – “I wish <names> a very happy birthday”, Alfred will generate the wish – “I wish John Doe, and Lionel Messi a very happy birthday”.
If there are mutliple wishes for each type, Alfred will randomly choose one.
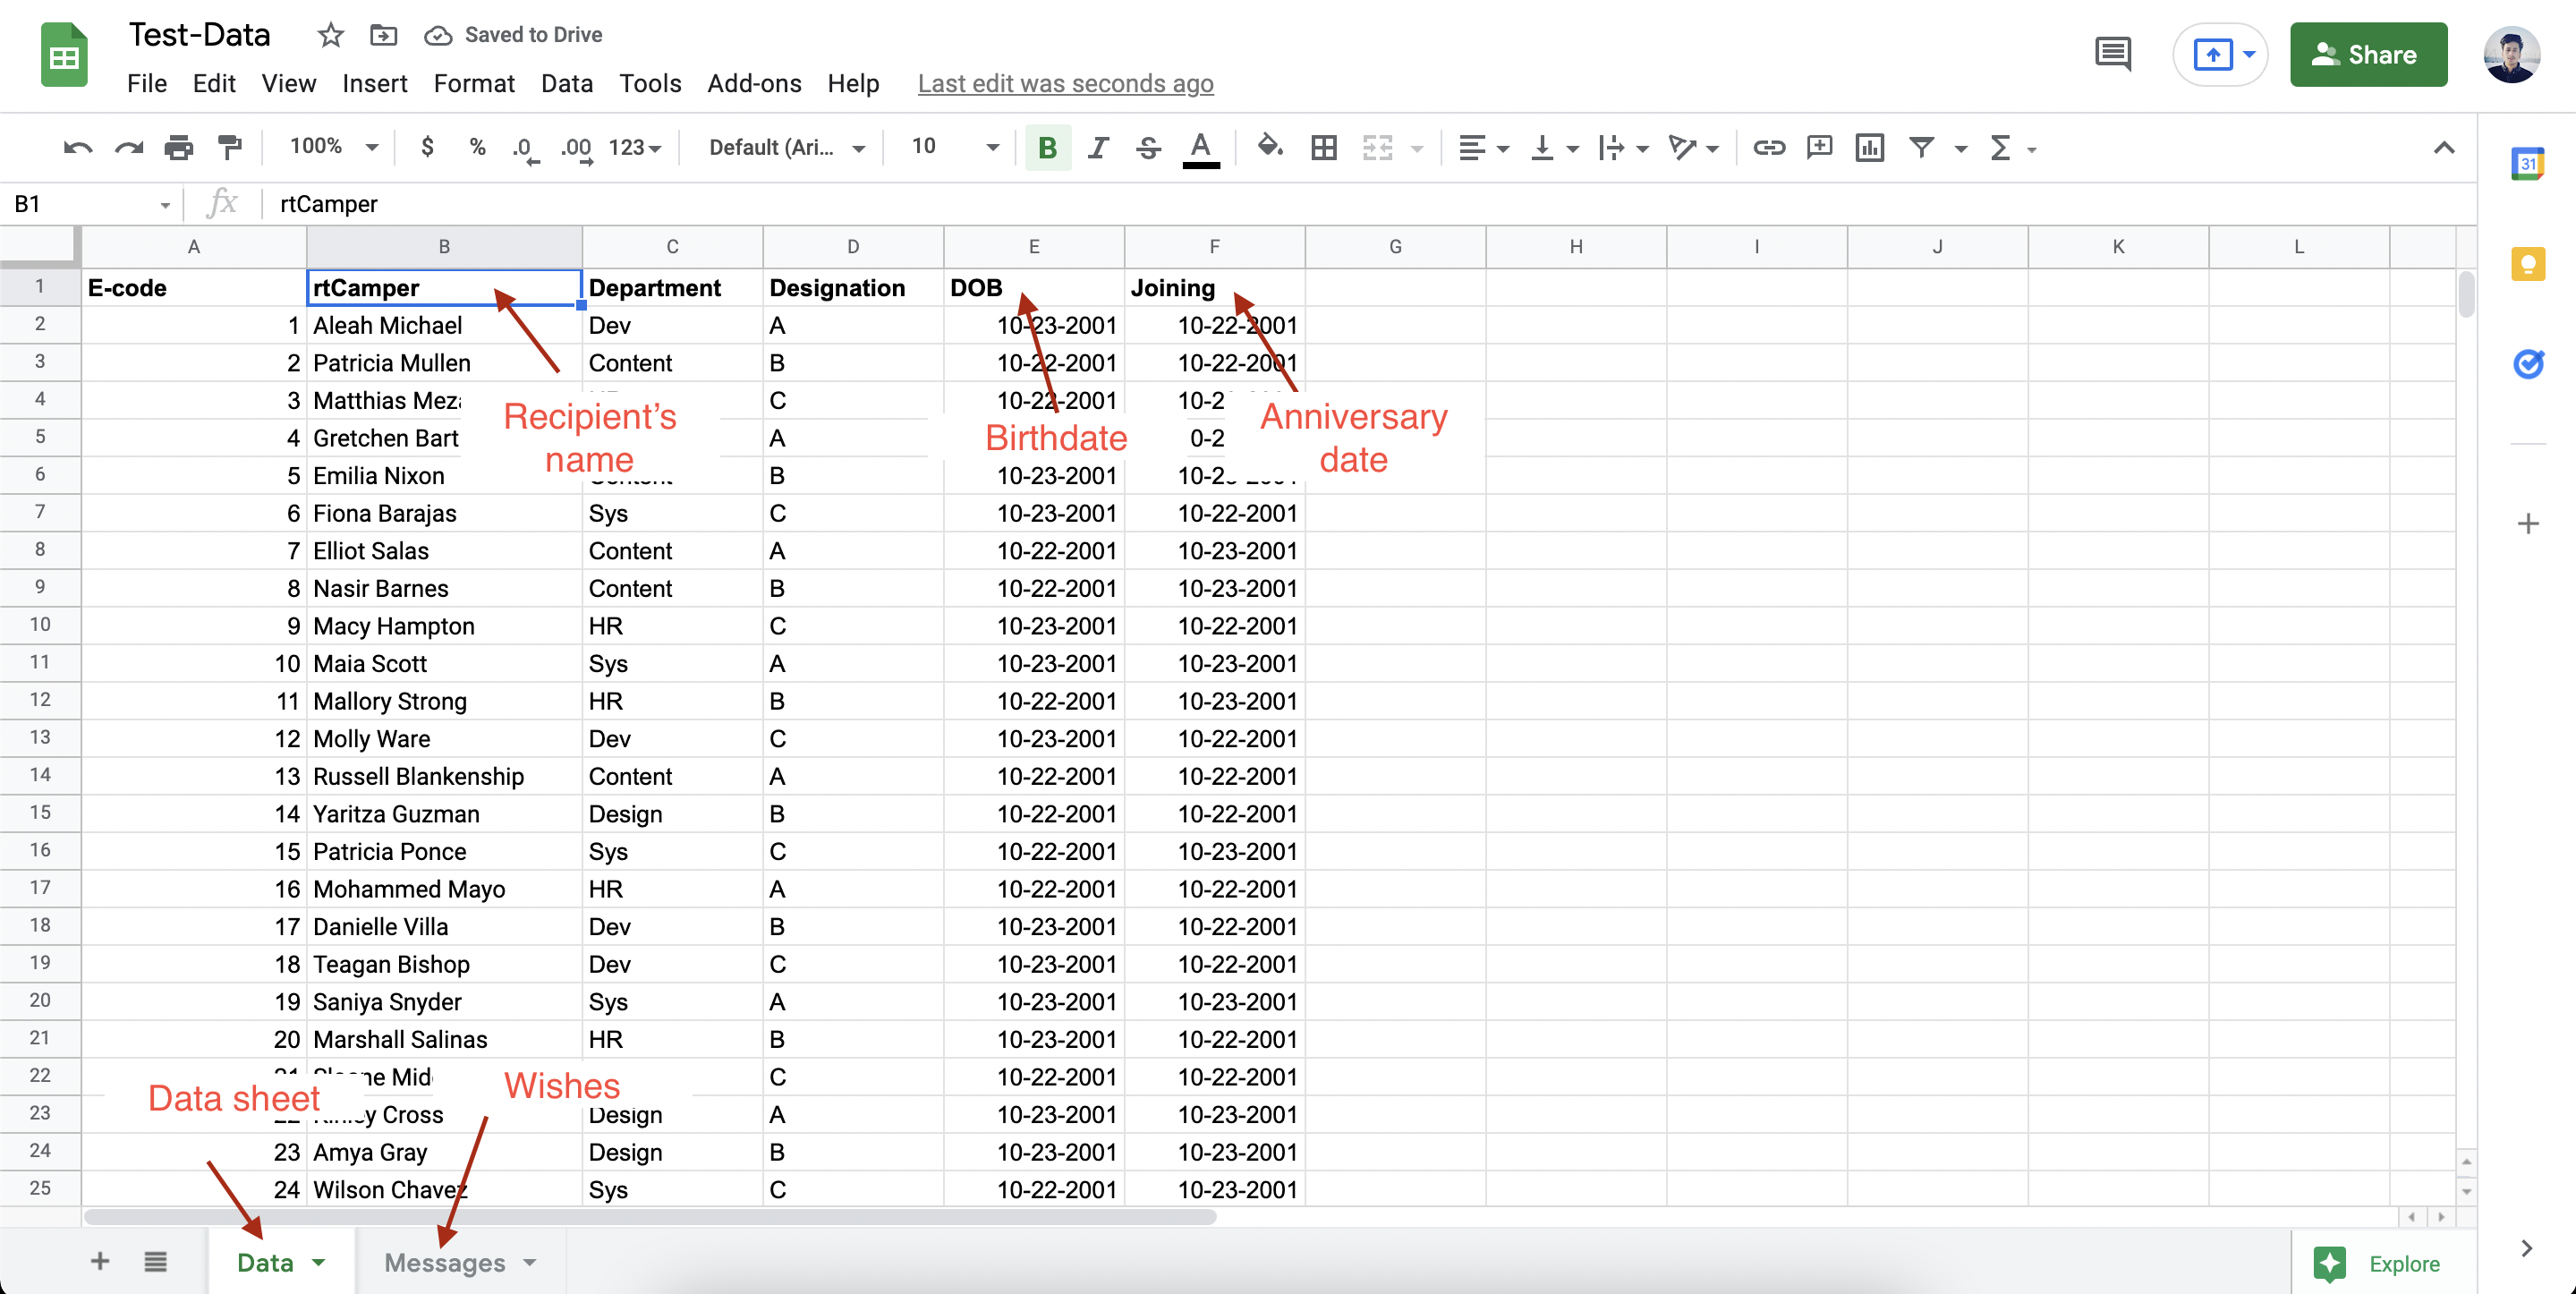
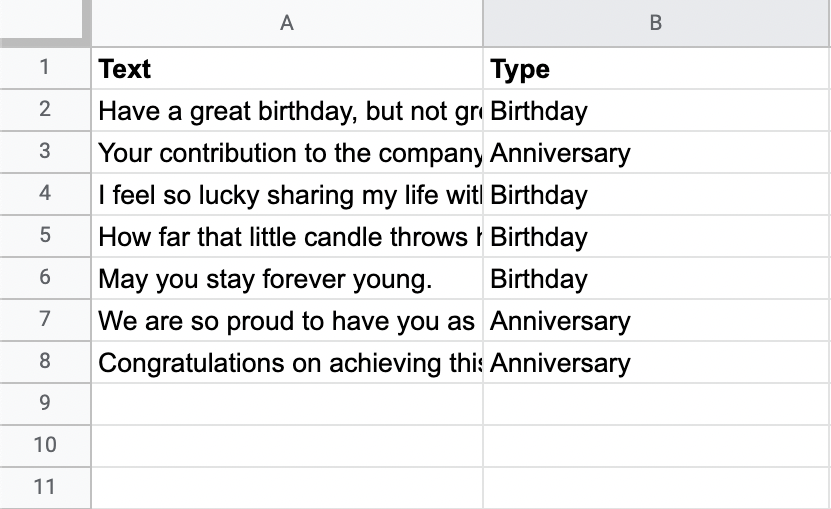
You can download a demo sheet (.xslx) using this link – https://github.com/danish17/alfred-slack-bot/blob/master/example-data/Test-Data.xlsx
Setting up the script
Now it is time to add Alfred to your Google Sheet. For that, we need to create a script and import Alfred as a library.
Open your sheet and click on Tools > Script Editor
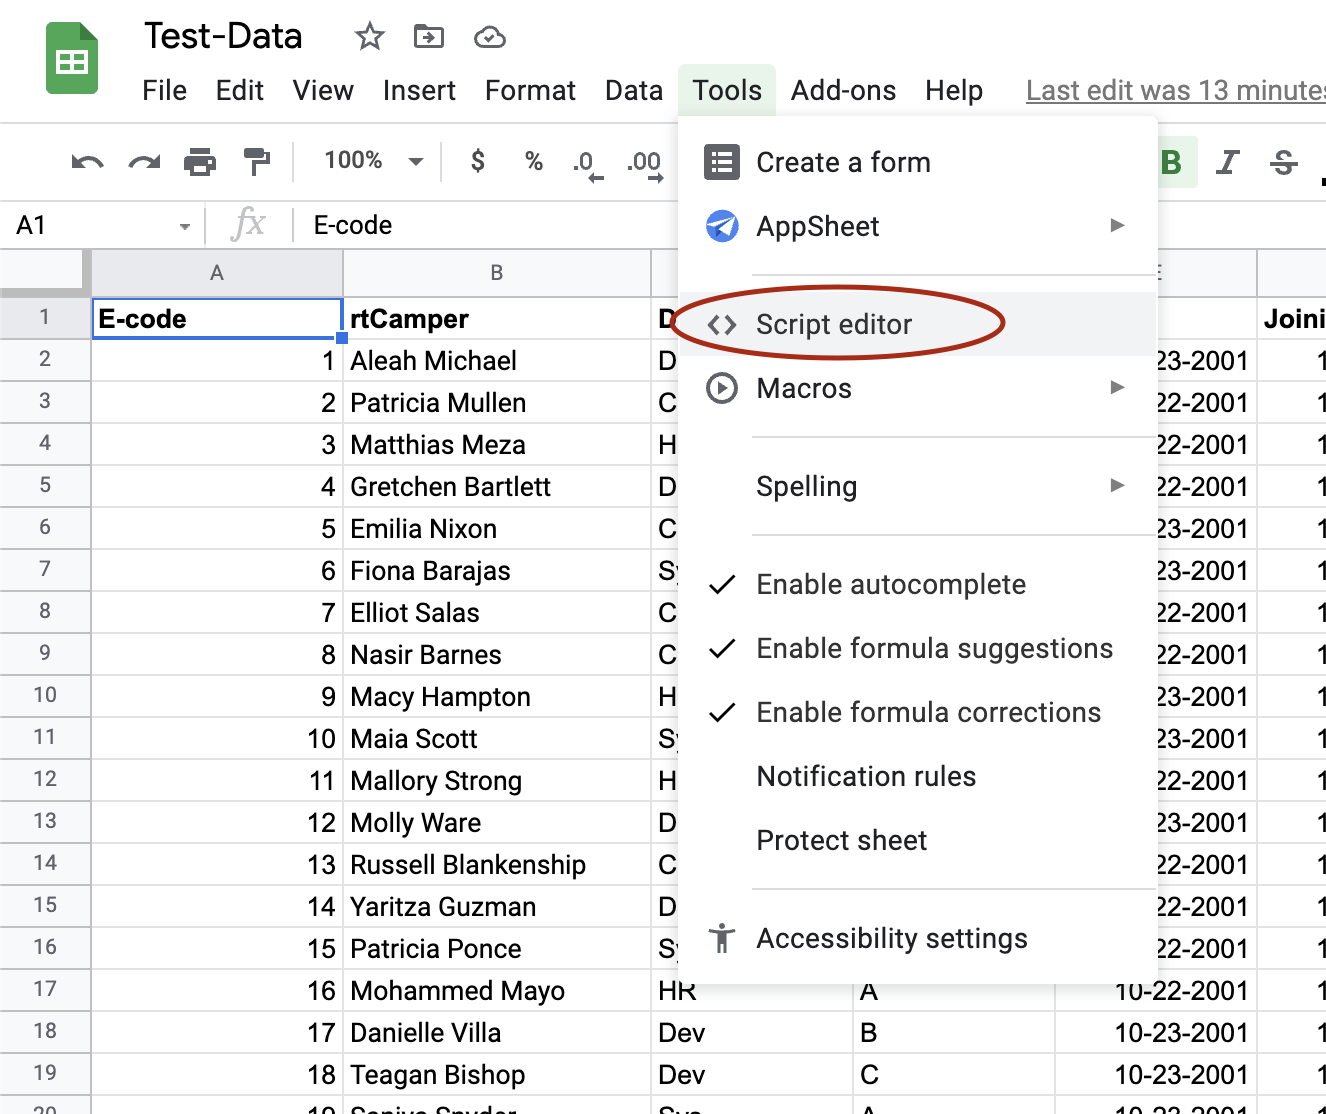
It will open Google Apps Script Console.
Importing Alfred
Before Alfred can serve us, we need to add him to the script. To do that, click on the Plus Icon (+) in front of Libraries in the left sidebar.
Paste the following Script ID: 1u4gU_yqTtdvhckO5JymTXz87MDKerxg8jc2bPeO4x6ATRS8O7cEs7eoj
Click on Look Up and it should detect Alfred. In Version, choose the latest version and hit Add. You may also choose HEAD (Development Mode) but it may cause breaking changes, so it is not recommended.
Note: There may be permission issues. Kindly drop a mail on [email protected] so that I can share access with you.


To check if Alfred is correctly working, you can add the following code and hit Run.
function main() {
  if (Alfred) Logger.log( 'Added' )
}
Configuring Alfred
Now, we need to configure how Alfred works. The first step to configuring Alfred is to add Alfred to your Slack workspace and obtain an Incoming Webhook URL.
Adding Alfred to Slack & Getting Webhook URL
To add Alfred, you can click the button below or visit the URL: https://slack.com/oauth/v2/authorize?scope=incoming-webhook,chat:write&client_id=2618518958503.2630472038933
After clicking, you will be redirected to alfred.danishshakeel.me and you will be shown the Incoming Webhook URL. Copy it, and save it.

Adding Alfred to your Google Script
Now that we have obtained the Webhook URL, we can move ahead. Open your Google Script and add the boilerplate code:
function alfredExample() {
  // Instantiate a new config object with the Slack Webhook URL.
  const config = createConfig(YOUR_SLACK_WEBHOOK_URL_HERE)

  // Set parameters.
  config.dataSheet = YOUR_DATA_SHEET_NAME_HERE // Set name of the sheet containing data.
  config.messageSheet = YOUR_WISH_SHEET_NAME_HERE // Set name of the sheet containing messages.
  config.dobColumnKey = YOUR_BIRTHDATE_COLUMN_KEY_HERE // Birthdate column key.
  config.annivColumnKey = YOUR_ANNIVERSARY_COLUMN_KEY_HERE // Joining Date/Anniversary column key.
  config.namesColumnKey = YOUR_NAMES_COLUMN_KEY_HERE // Names column key.
  const date = new Date() // Init a date object.
  // date.setDate(date.getDate() - 1) // Example: match events for yesterday.
  config.dateToMatch = date // Set date.

  // Configure messages.
  config.birthdayHeader = YOUR_BIRTHDAY_HEADER_HERE
  config.birthdayImage = YOUR_BIRTHDAY_IMAGE_URL_HERE
  config.birthdayTitle = YOUR_BIRTHDAY_TITLE_HERE
  config.anniversaryHeader = YOUR_ANNIVERSARY_HEADER_HERE
  config.anniversaryImage = YOUR_ANNIVERSARY_IMAGE_URL_HERE
  config.anniversaryTitle = YOUR_ANNIVERSARY_TITLE_HERE

  // Run Alfred.
  runAlfred(config);
}
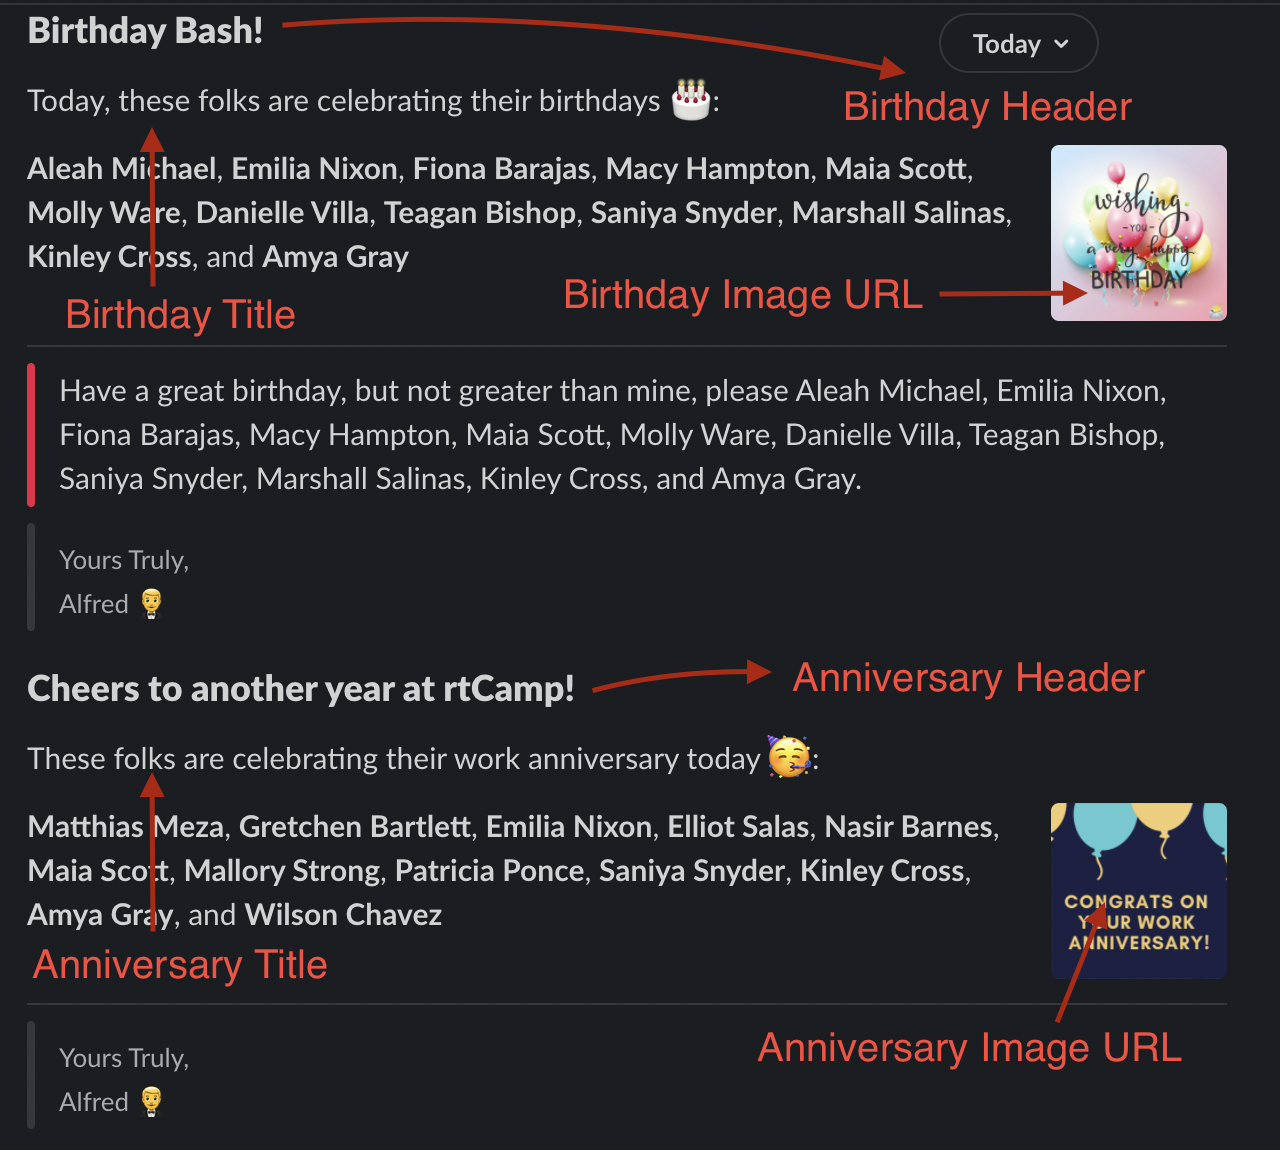
For our example:
config.dataSheet = 'Data'(Sheet name which contains users’ data)config.messageSheet = 'Messages'(Sheet name which contains wishes)config.dobColumnKey = 'DOB'(Column name which contain birthdates)config.annivColumnKey = 'Joining'(Column name which contains anniversary dates)config.namesColumnKey = 'rtCamper'(Column name which contains users’ names)
For the messages, you can choose almost anything including some markdown and emojis.
Test
You can use Alfred.testAlfred(config)to test Alfred.
Note: It will send a message to the Slack channel that you've given Alfred access to.
Setup Automatic Messaging (Triggers)
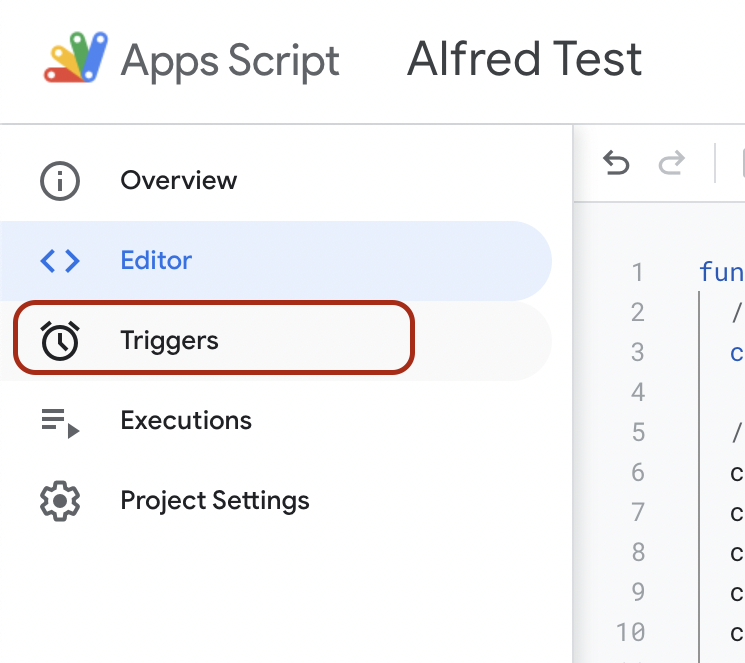
You would want to make Alfred automatically wish people everyday. For this purpose, we will utilize Google’s Time-Based Triggers. In your Script Console, click on the Timer icon (⏰).
Now, click on ‘Add Trigger’ button. We will run our function everyday at 8AM – 9AM Indian Standard Time.
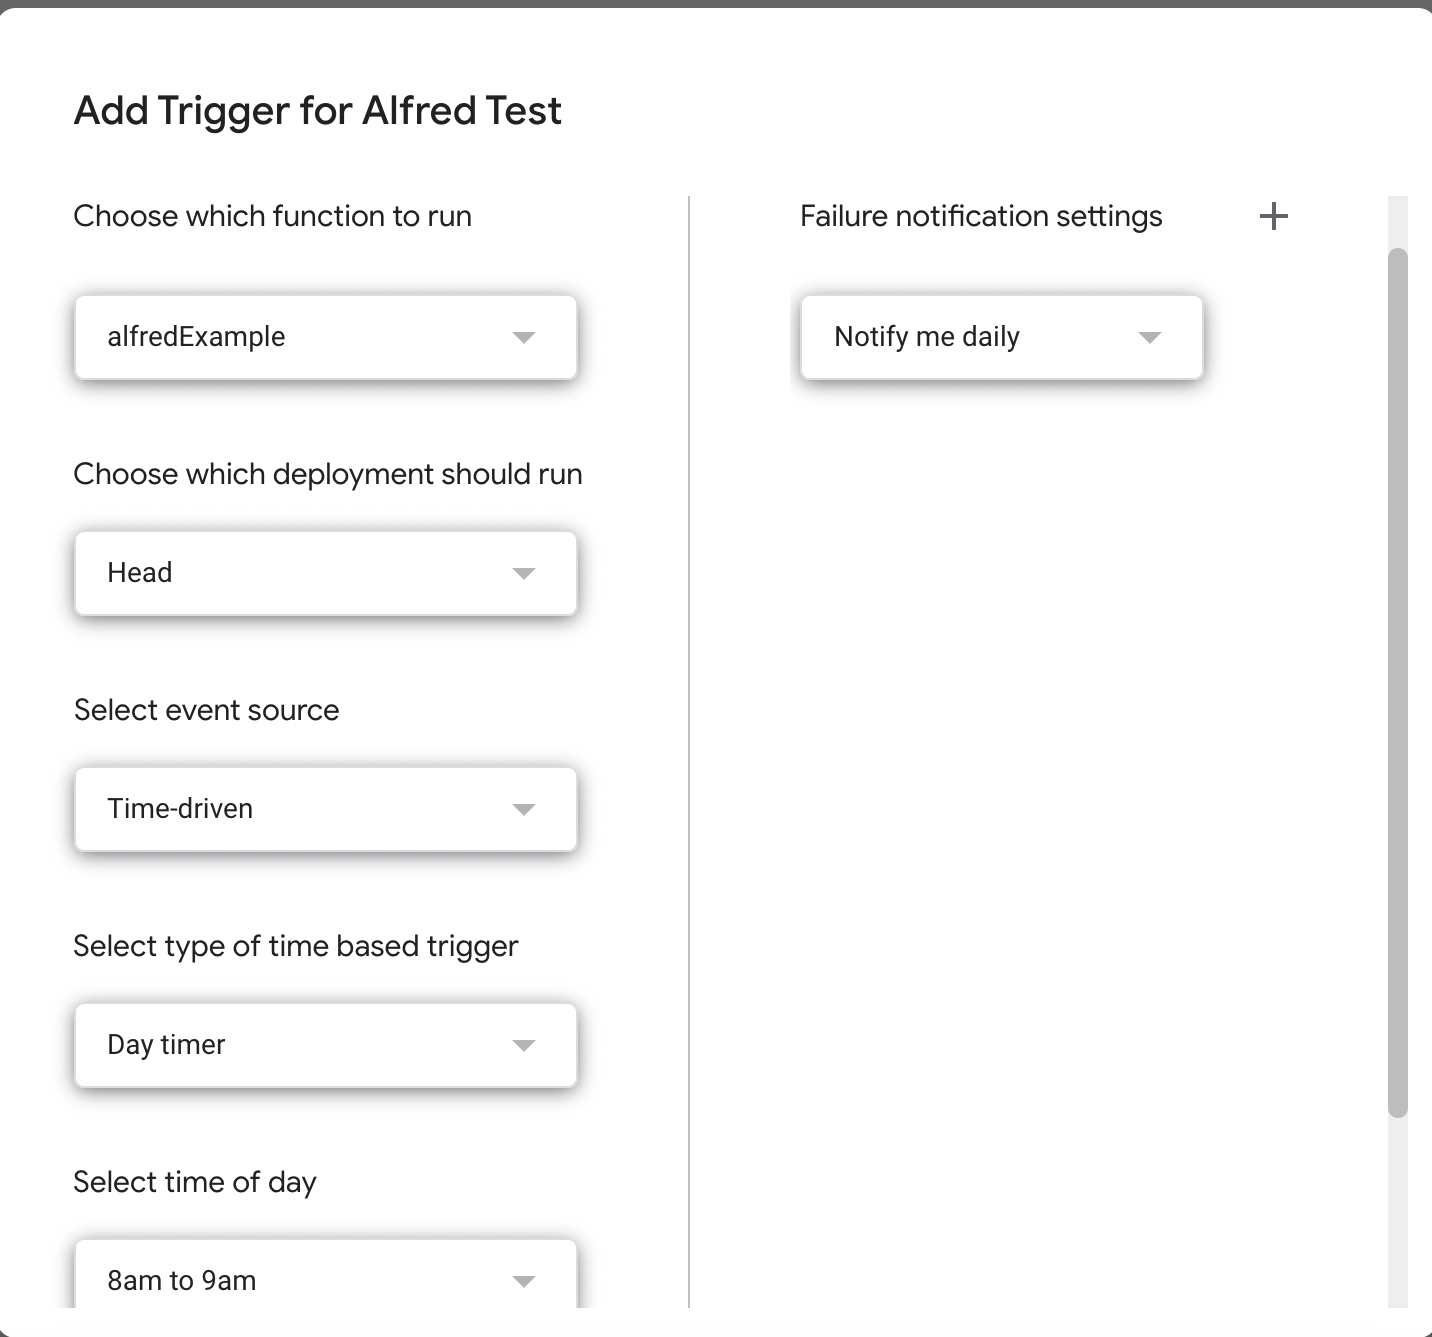
Voila! Alfred is all ready to send out wishes in your Slack workspace every day.
Future of Alfred
There are a lot of things that we can add to Alfred. Although Alfred was born to send out birthday and anniversary wishes, we can add the ability to send out important notifications.
In the short-term, I am planning to add:
- Ability to create custom layouts
- Use separate Google Spreadsheets for Data and Messages
- Add codebase for JavaScript and Python
I want to see Alfred as an all-in-one Slack bot that behaves like the real ‘Alfred Pennyworth’
Leave a Reply